Hola, mi gente linda de @needleworkmonday, un gusto saludarlos y desearles una semana llena de alegrías y bendiciones. Que toda la creatividad llegue a sus manos y puedan realizar lindos proyectos para compartir por esta bella comunidad.
En este lunes de costura les vengo a mostrar cómo estuve realizando este vestido de bautizo para mi princesa Ámbar. La semana pasada les mostré cómo le hice uno a mi hija Arianna, que también la bauticé.
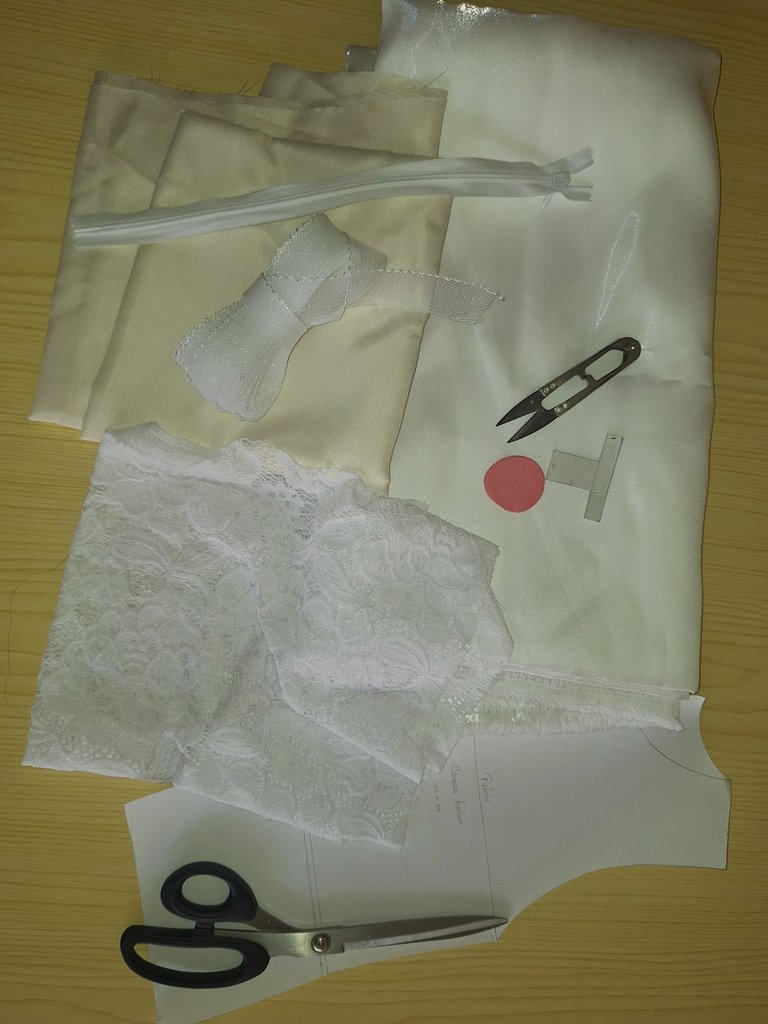
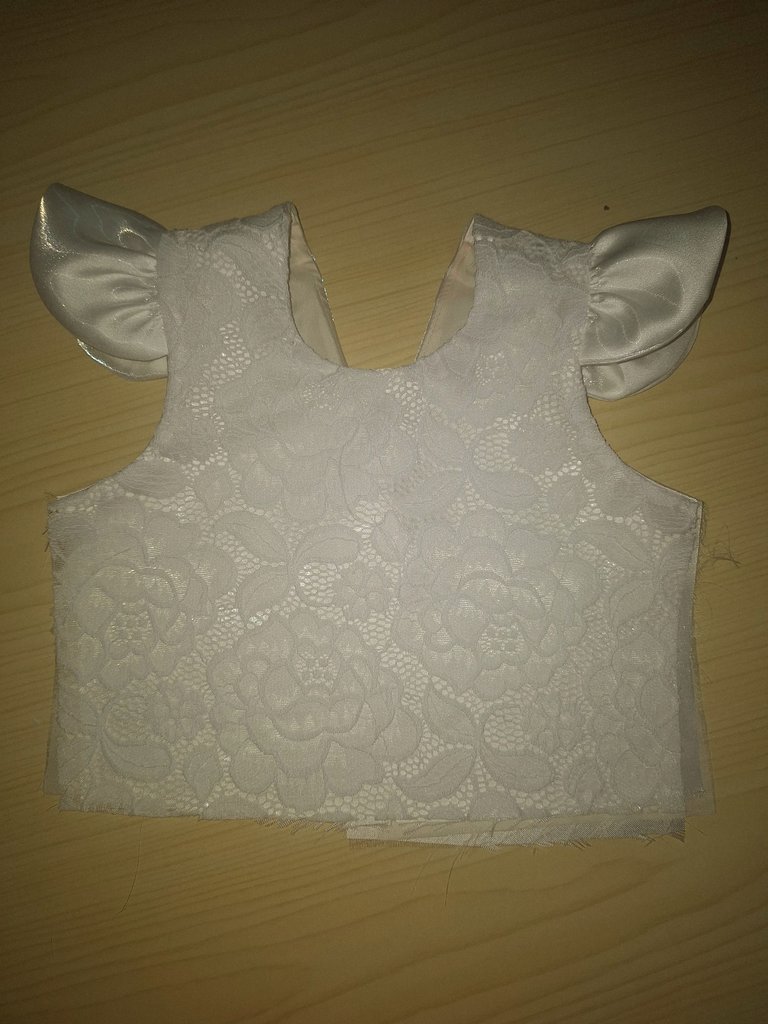
Para su realización utilicé un poco de tela de encaje que me quedó del vestido de Arianna y así, aunque los vestidos no son iguales, sí que tuvieran alguna similitud.
Compre una tela demasiado bella, se llama Satín Emily, es como para vestidos de boda. En cuanto la vi me enamoré de ella y me encantó para hacerle el vestido a mi princesa más pequeña.
Y para el forro, compré una tela sencilla llamada ponge, en un color crema, ya que blanco no había. Otra cosa que no había usado en las costuras, es un material que le dicen crin, no recuerdo bien cómo se llama y es para darle un mejor acabado al ruedo.
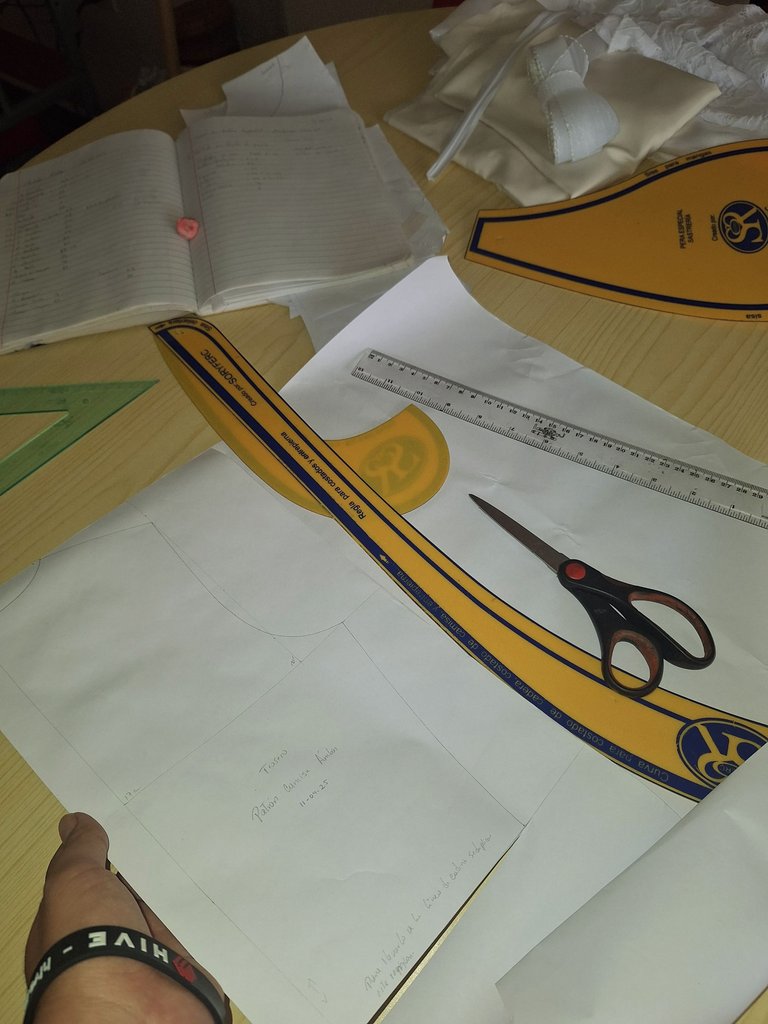
Hice los patrones para que el vestido le quedara a la medida.
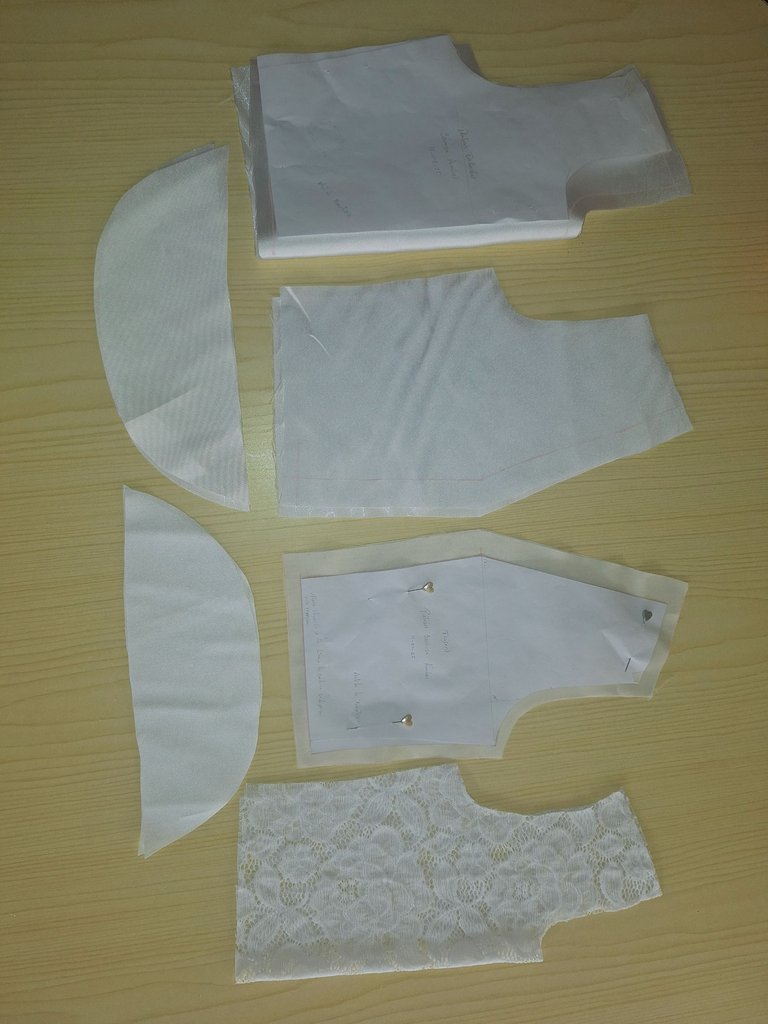
Con los patrones, lo pasé a los 3 tipos de telas, marcando con tiza, luego pasé a recortar cada pieza, dejando 1 cm de costura. También le hice las mangas.
Para hacer la falda, tuve que hacer unos cálculos matemáticos, je, je, je. Según unos videos que estuve viendo en YouTube, gracias a Dios que vi varios y así hacerlo de la mejor manera.
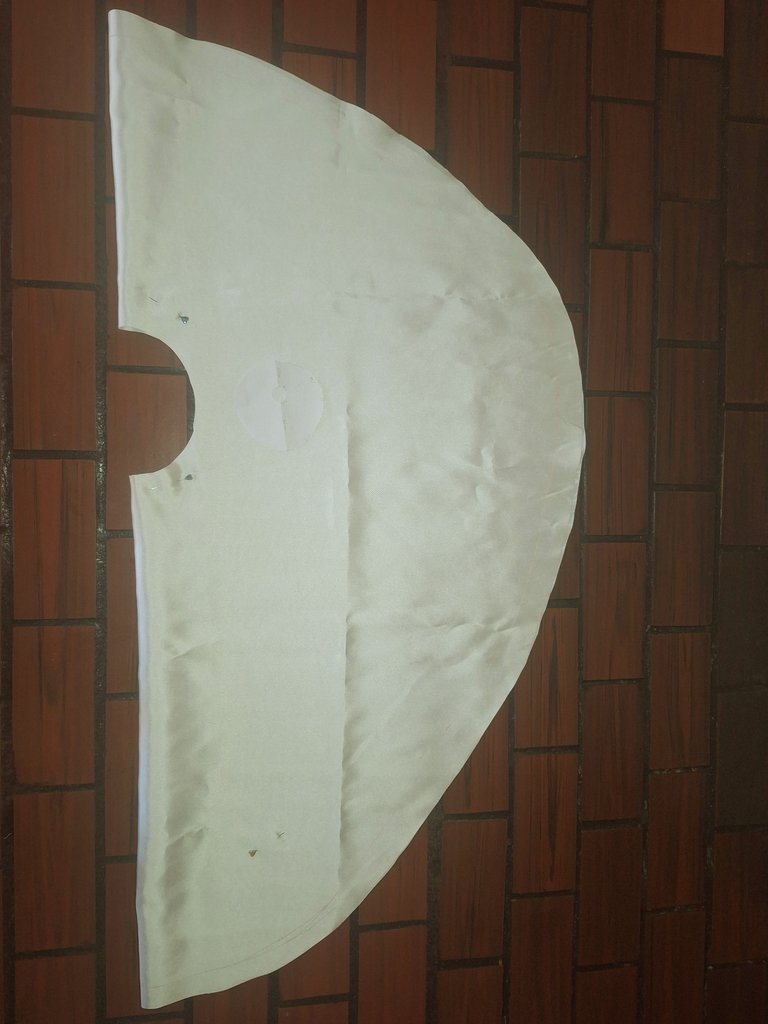
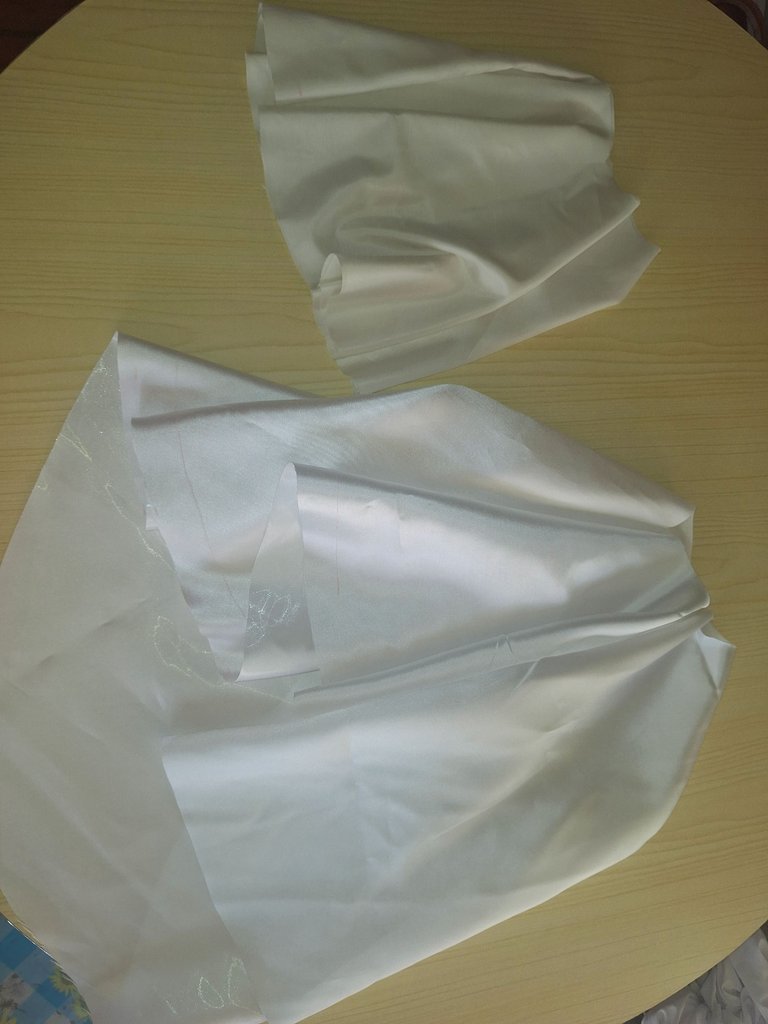
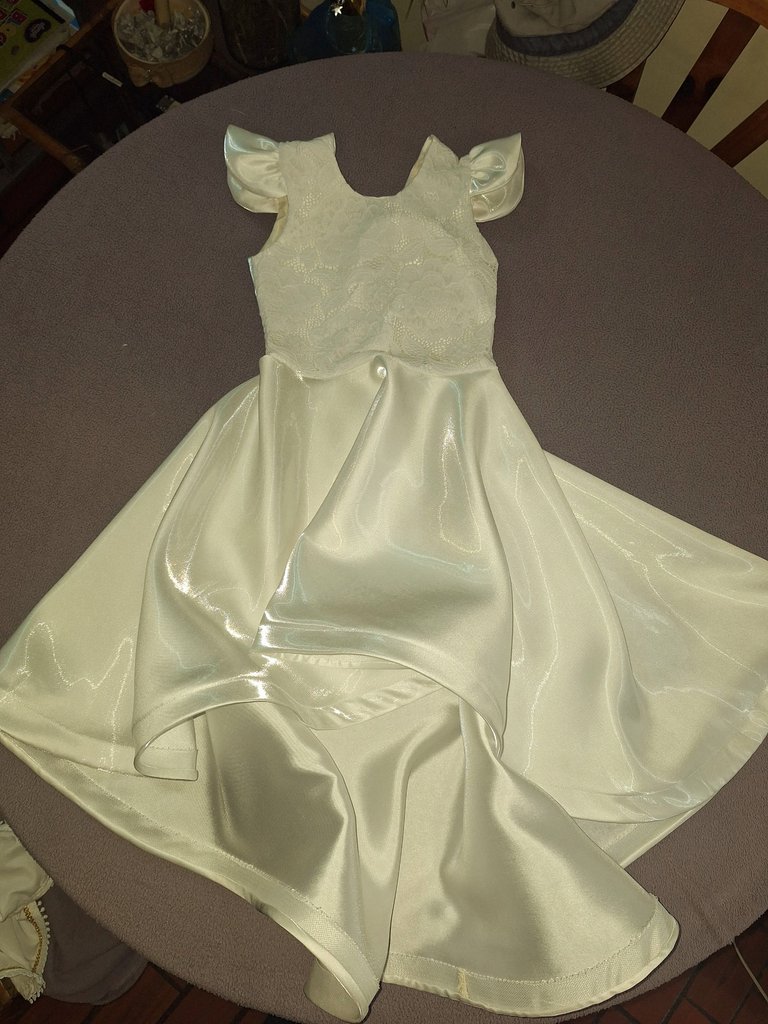
Esta falda es circular y es tipo cola, más corta por la parte de adelante y más larga por la espalda. El forro sí fue solo corte circular.
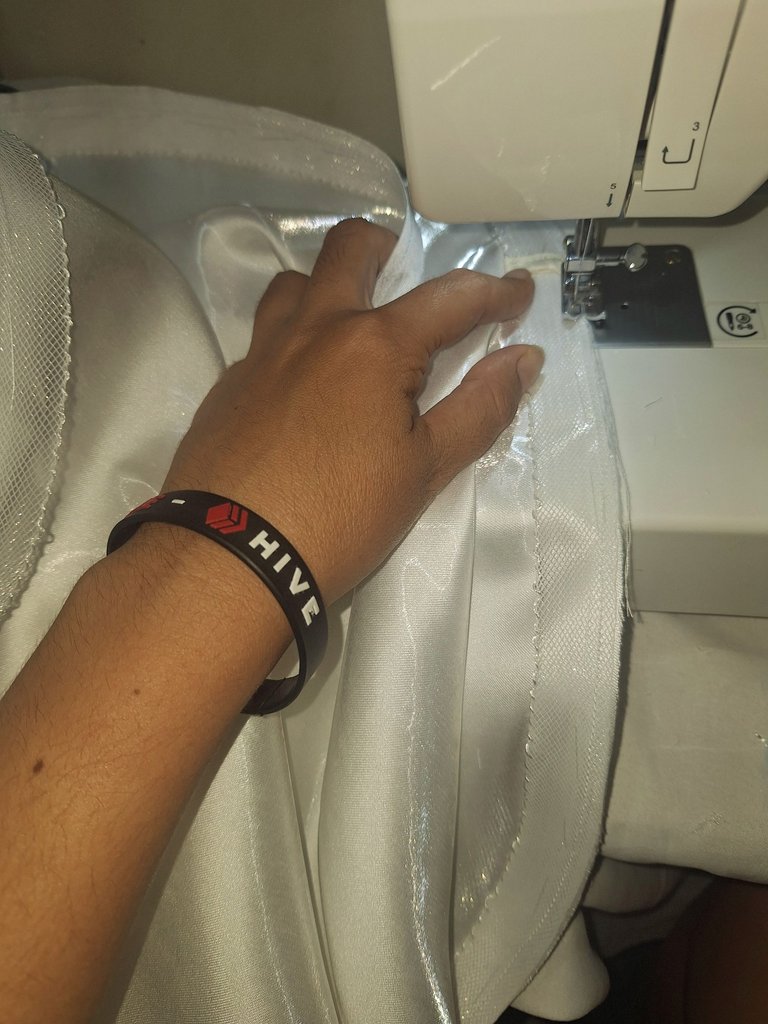
Luego empezó la acción: activar la máquina de coser, resarle a todos los santos para que se portara bien y no se rompiera tanto el hilo. Ya esa porta bobina se las trae, je, je, je.
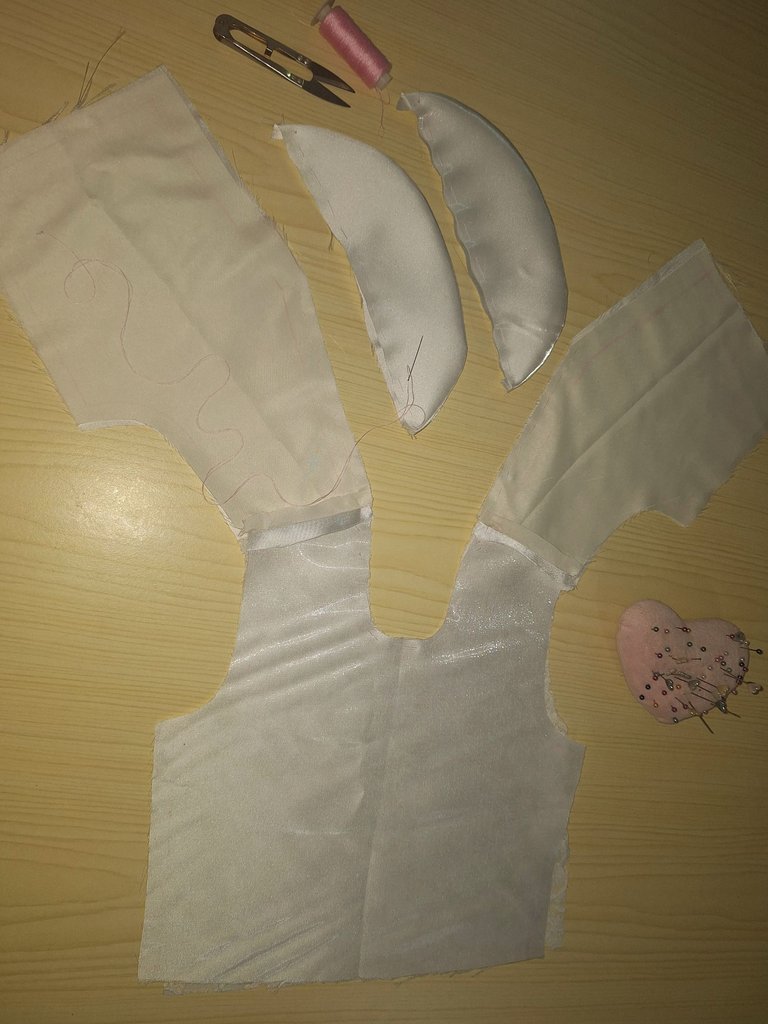
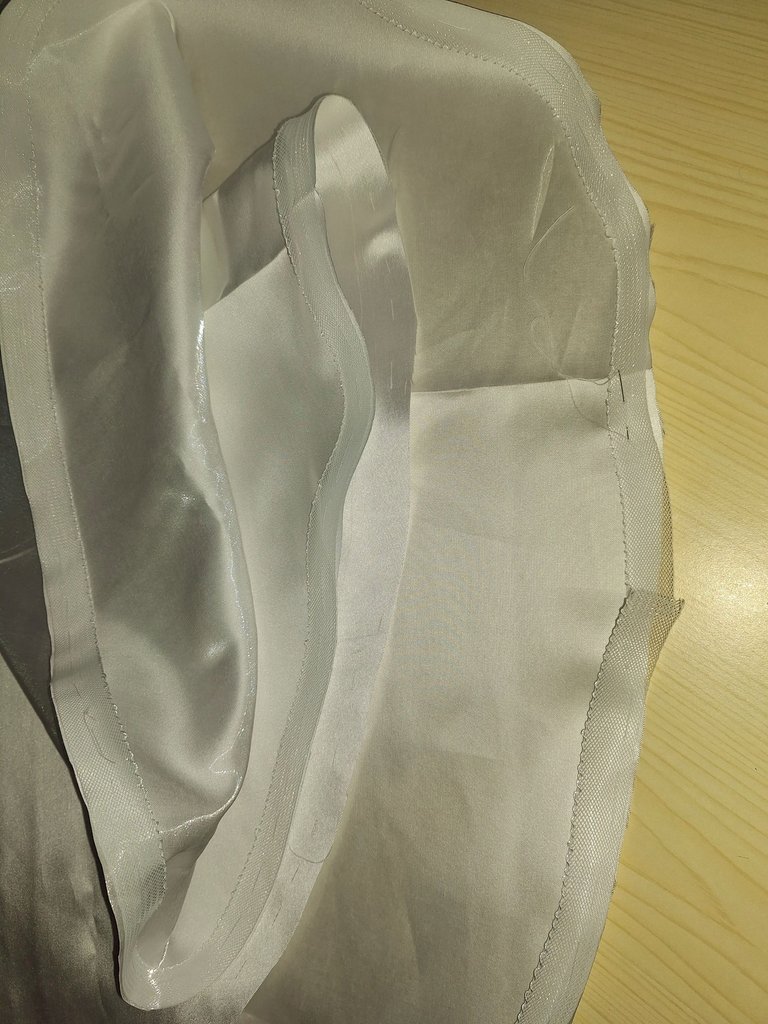
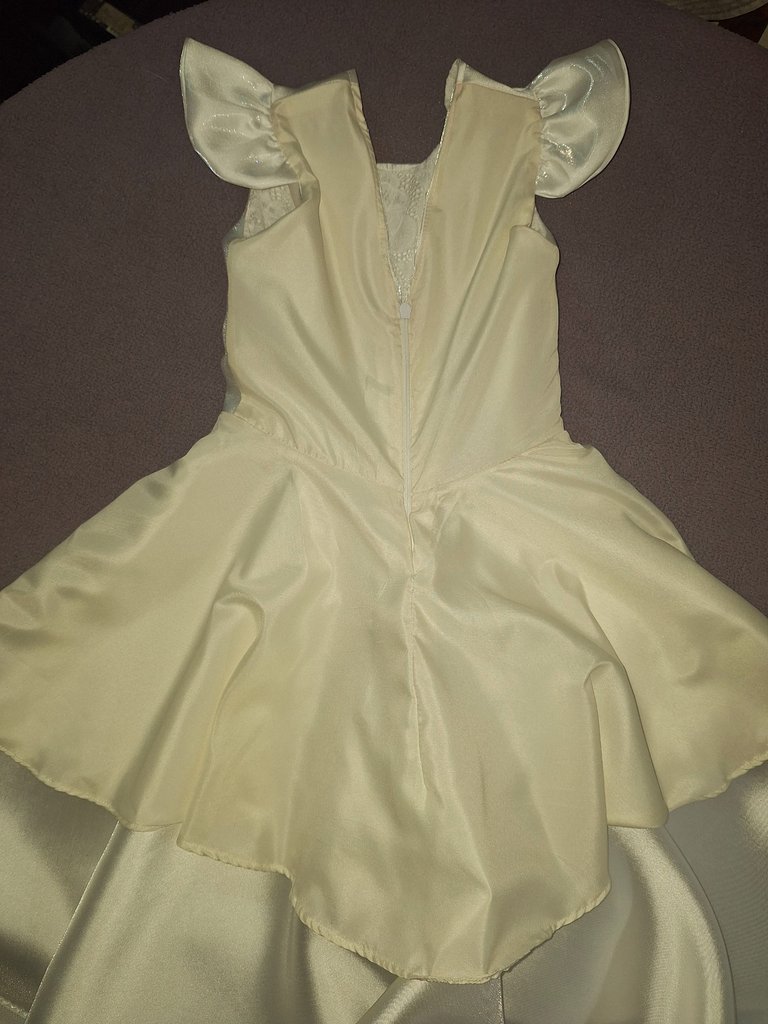
Empezar cociendo la parte de los hombros, tanto las piezas de forro como las telas principales. Fue un enredo colocar esa tela satén, que la coloque en la parte frontal del forro, pero que el brillo se viera a través de la tela de encajes.
Las mangas, también tenían forro de la misma tela, le hice doble costura para fruncir y quedó de un bello. Esas mangas me gustaron mucho cómo quedaron.
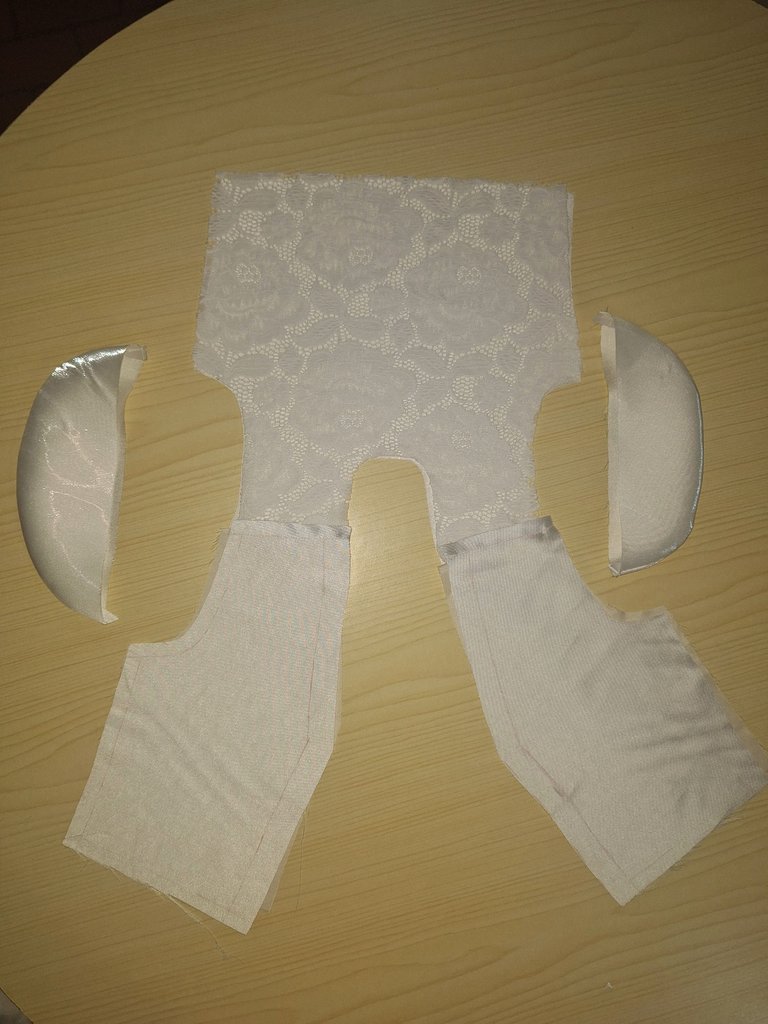
Pero como nunca faltan cuentos en mis costuras, la blusa, como era embonada con las mangas, lo cosí como no era, ya había repisado las costuras y cortado sobrante y todo. Pero igual tocó deshacerse y volver a armar. Al final, miren qué linda quedó la camisa forrada.
Teniendo la blusa armada, continúe con las faldas. Antes de coserla a la blusa, le hice los ruedos, al forro y luego con la falda principal le cosí la crin, el cual le da más forma al ruedo, se ve tan bonito y bien presentado.
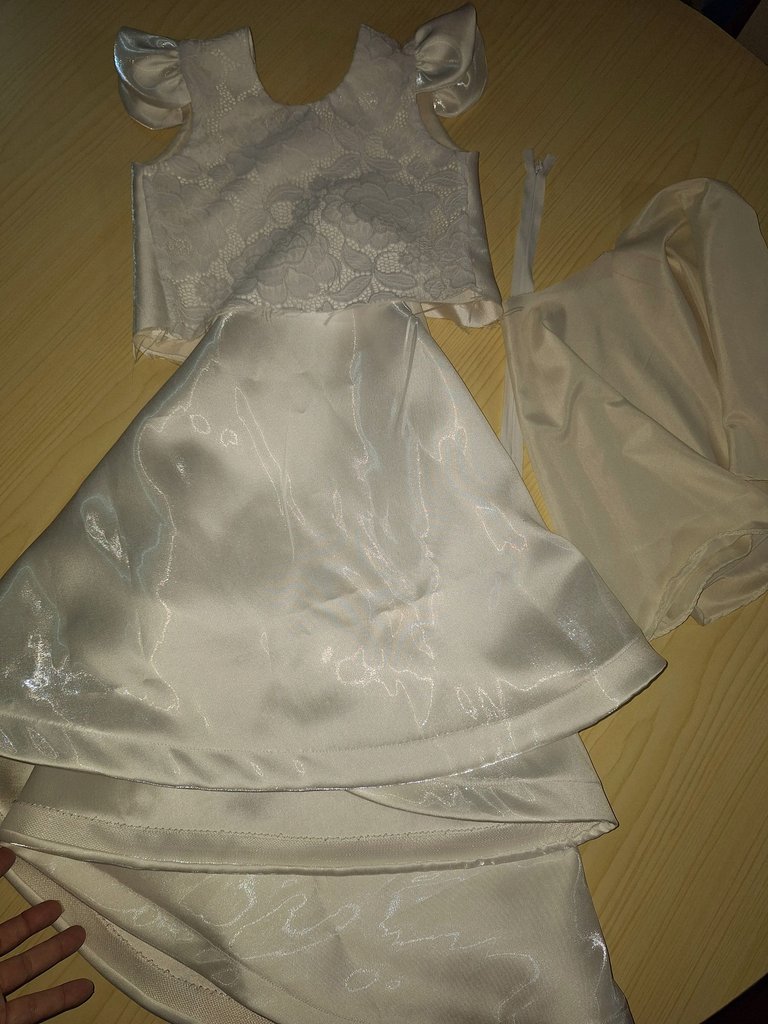

En este punto ya tenía todas las piezas listas, faltaba ensamblar. Pegué las faldas con la blusa y su forro. El proceso fue pegar el cierre. Ya tenía idea de cuándo hice el vestido de Arianna, pero pensé que este era más sencillo.
No fue así, ya que el escote sen V, se me hizo dificultoso, eche cabeza demás, lo bueno que resolví, aunque tuve un error de cálculo y el cierre no quedó justo en la terminación del escote, pero igual se ve bien.
El cierre lo pegue con un prensatela que me ayudó mucho y aunque no era el especial de cierre invisible quedó bien.
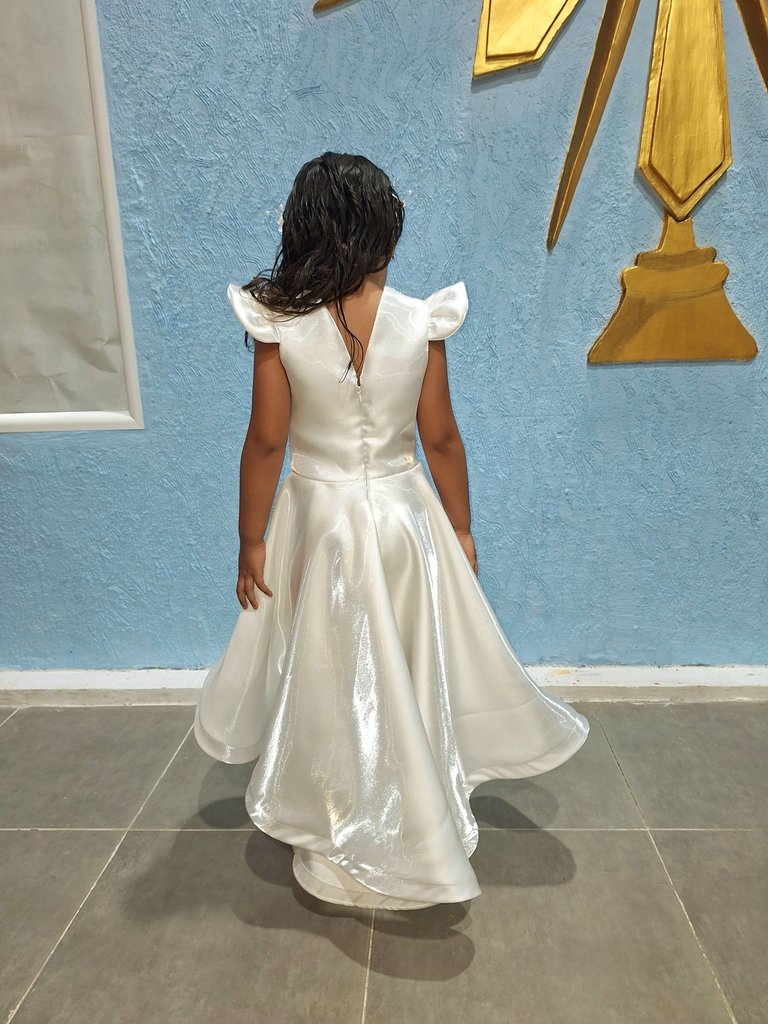
Miren como me quedó, totalmente forrado y para esto hubo que coser a mano, con costura escondida, para que el forro se ajustará por el lado del cierre.
Para cocer el cierre a la falda circular, también tiene su técnica, algo que me dio dolores de cabeza también. Pero con la práctica los cálculos me saldrán mejores. Ya que al trabajar con el contorno de la cintura, hay que darle un poco más de olgura, para que quede el espacio para colocar el cierre.
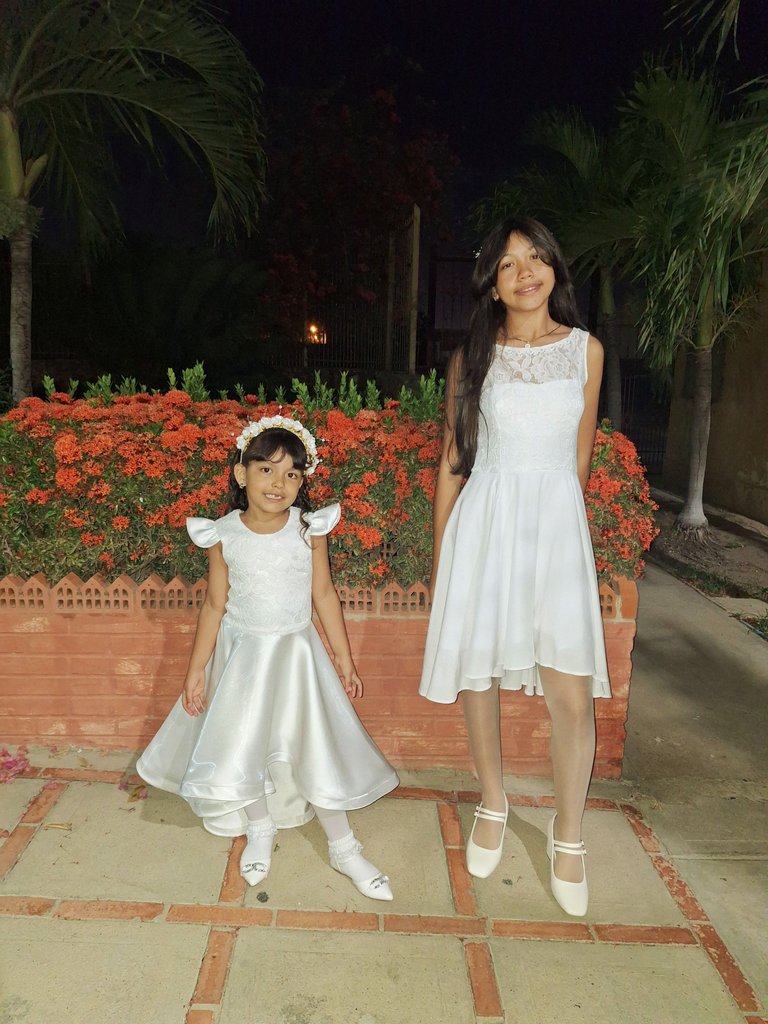
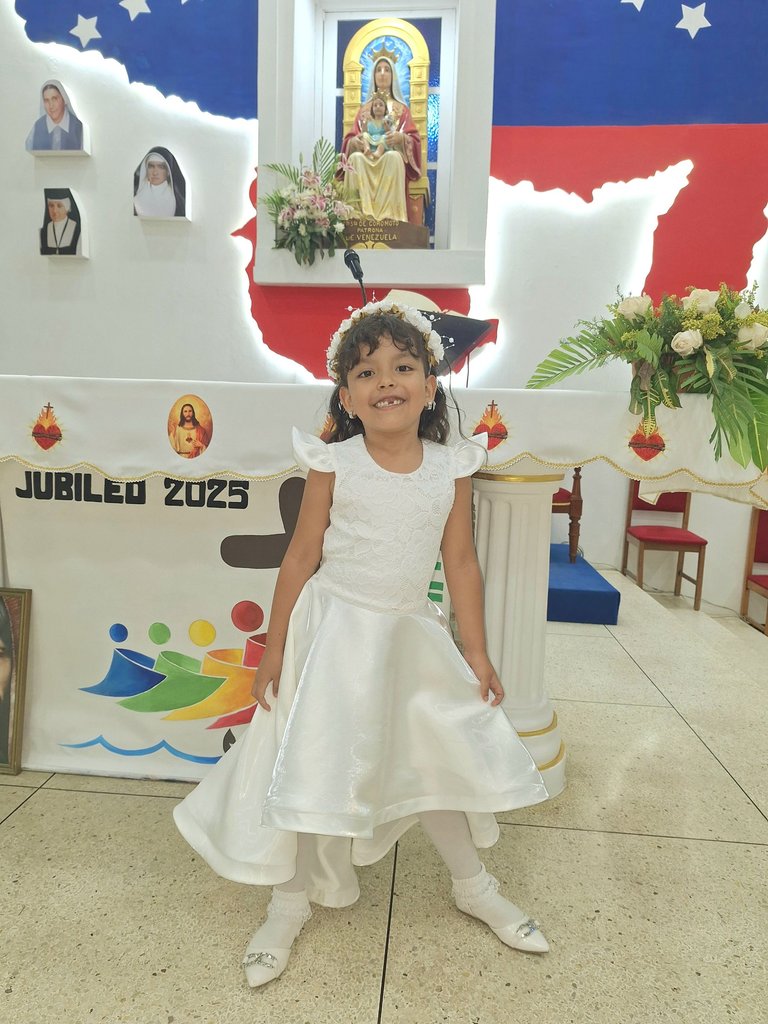
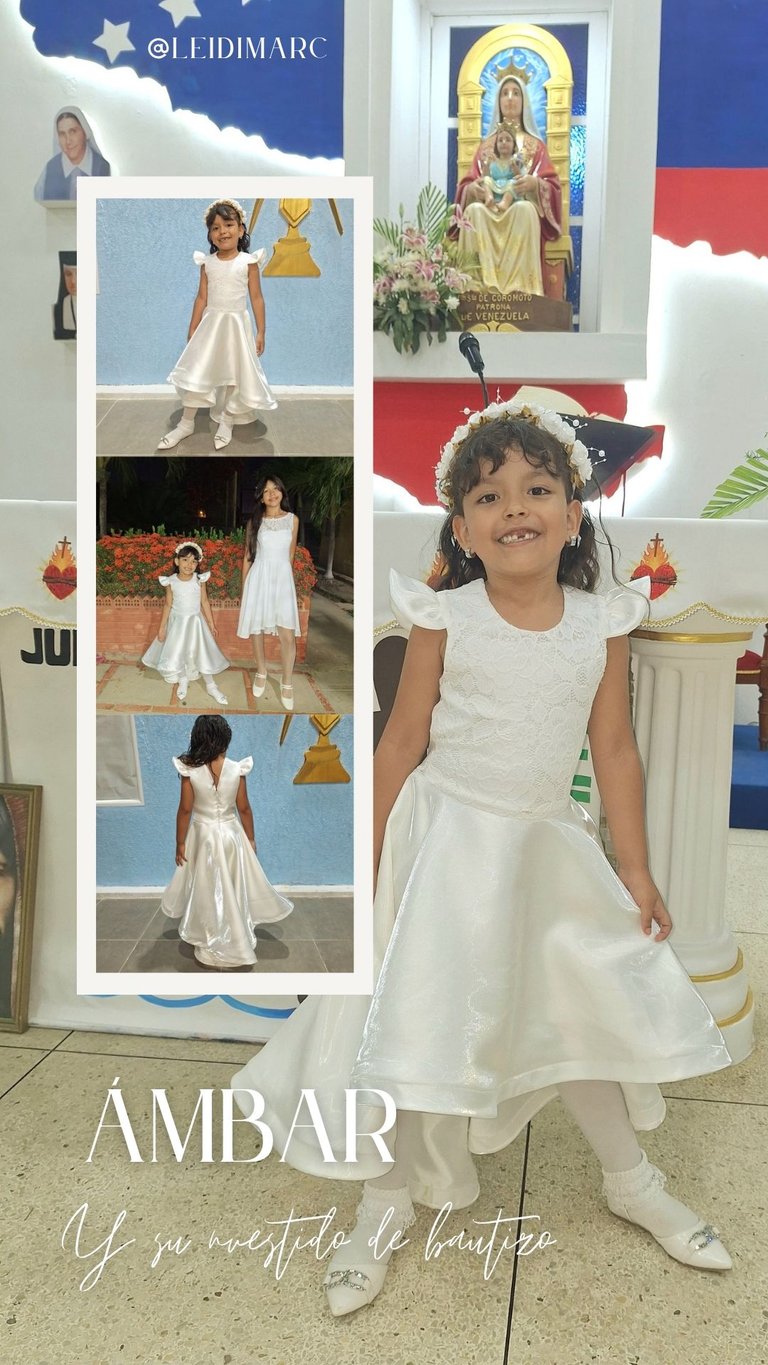
Ahora si, vean mis hermosas modelos. Por aquí les muestro una foto de mis dos princesas, el vestidos de Arianna, les mostré el proceso aquí, por si lo quieren ver.
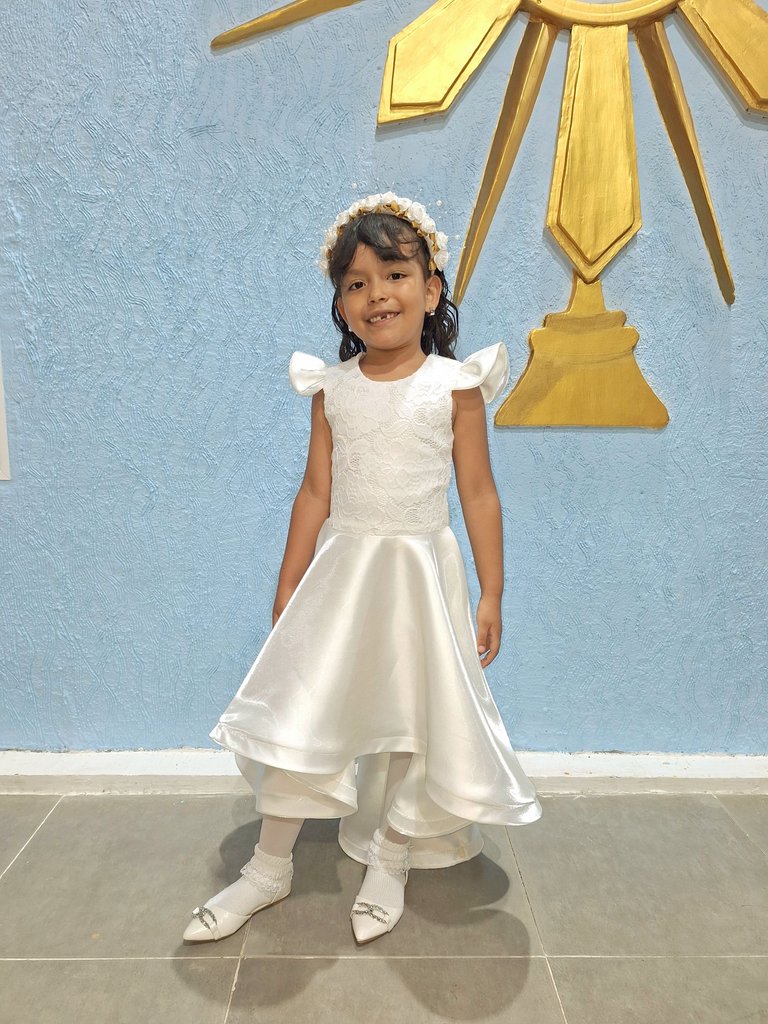
Mis niñas se veían preciosas. Como la protagonista de esas publicación es mi bella Ámbar, aquí le luce mi creación como toda una modelo, se veía como un angelito en la iglesia.
Levanto las mirada de muchos en la iglesia, ella decía que quería ser la más bella del bautizo y si, estaba tan bella mi niña.
Le quería colocar una cinturilla con un lazo atrás, pero ella no quiso. Creo que más adelante se la voy a poner, ya que lamentablemente el día del bautizo había duelo en la familia y no pudimos hacer celebración.
Como la comunión de Arianna es en junio con el favor de Dios, les haré doble celebración de bautizo y de comunión y a Ámbar le pondré este vestido, claro a Arianna me toca hacerle otro vestido, así que trabajo es lo que me viene, por su puesto se los compartiré por aquí.
Bueno, amigos, esto ha sido todo por hoy. Será para una próxima oportunidad en donde les mostré los trajes de baños que le hice a mis princesas, que por cierto, por el mismo duelo no se los pudieron estrenar.

Ámbar and her beautiful christening gown
Hello, my beautiful people of @needleworkmonday, a pleasure to greet you and wish you a week full of joys and blessings. May all the creativity come to your hands and may you be able to make beautiful projects to share for this beautiful community.
In this sewing Monday I come to show you how I was making this christening dress for my princess Amber. Last week I showed you how I made one for my daughter Arianna, who I also baptized.
To make it I used some lace fabric that I had left over from Arianna's dress so that, although the dresses are not the same, they would have some similarity.
I bought a very beautiful fabric, it's called Satin Emily, it's like for wedding dresses. As soon as I saw it I fell in love with it and I loved it to make the dress for my youngest princess.
And for the lining, I bought a simple fabric called pongee, in a cream color, since there was no white. Another thing that I had not used in the seams, is a material called horsehair, I do not remember what it is called and it is to give a better finish to the hem.
I made the patterns so that the dress would fit her.
With the patterns, I made the 3 types of fabrics, marking them with chalk, then I cut out each piece, leaving 1 cm of seam allowance. I also made the sleeves.
To make the skirt, I had to do some mathematical calculations, heh, heh, heh. According to some videos I was watching on YouTube, thank God I saw several and so I did it in the best way.
This skirt is circular and is tail type, shorter in the front and longer in the back. The lining was just circular cut.
Then the action began: activate the sewing machine, subtract all the saints to make it behave well and not break the thread so much. Already that bobbin holder is a real handful, heh, heh, heh, heh.
Start sewing the shoulder part, both the lining pieces and the main fabrics. It was a mess to place that satin fabric, which I placed on the front of the lining, but the sheen showed through the lace fabric.
The sleeves were also lined with the same fabric, I double stitched them to gather and they were beautiful. I really liked the way those sleeves turned out.
But as there is never a lack of stories in my sewing, the blouse, as it was embonada with the sleeves, I sewed it as it was not, I had already smoothed the seams and cut the excess and everything. But I still had to take it apart and put it back together again. In the end, look how beautiful the lined shirt turned out.
Having the blouse assembled, I continued with the skirts. Before sewing it to the blouse, I made the ruffles, the lining and then with the main skirt I sewed the mane, which gives more shape to the ruffle, it looks so pretty and well presented.
At this point I had all the pieces ready, the only thing left to do was to assemble. I glued the skirts to the blouse and its lining. The process was to glue the zipper. I already had an idea of when I made Arianna's dress, but I thought this one was simpler.
It wasn't, because the V neckline was difficult, so I had to put the rest of my head in, but I solved it, although I had a calculation error and the zipper wasn't right at the end of the neckline, but it still looks good.
I glued the zipper with a presser foot that helped me a lot and although it was not the special invisible zipper, it looked good.
Look how it turned out, fully lined and for this I had to sew by hand, with a hidden seam, so that the lining would fit on the side of the zipper.
To sew the zipper to the circular skirt, also has its own technique, something that gave me headaches too. But with practice the calculations will work out better for me. Since when working with the waistline, you have to give it a little more elongation, so that there is space to place the zipper.
Now, look at my beautiful models. Here I show you a picture of my two princesses, Arianna's dress, I showed you the process here, if you want to see it.
My girls looked beautiful. As the protagonist of this publication is my beautiful Amber, here she looks like a model, she looked like a little angel in the church.
She raised the eyes of many in the church, she said she wanted to be the most beautiful of the baptism and yes, she was so beautiful my little girl.
I wanted to put a waistband with a bow in the back, but she didn't want it. I think I will put it on her later, because unfortunately the day of the baptism there was a family mourning and we couldn't celebrate.
As Arianna's communion is in June with God's favor, I will make a double celebration of baptism and communion and I will wear this dress for Amber, of course I will have to make another dress for Arianna, so I will have to work, of course I will share it with you here.
Well, friends, that's all for today. Next time I will show you the bathing suits I made for my princesses, which by the way, because of the same duel they couldn't wear them for the first time.
Mi blog es familiar, de mi día a día, en donde puedo subir fotos de niños u otras personas de mi entorno, NO autorizo a usar mis fotografías sin mi autorización.
My blog is a family blog, of my daily life, where I can upload photos of children or other people around me, I do NOT authorize you to use my photos without my authorization.
Dispositivo | Device | Samsung Galaxy A54
Fotos editadas en: |Photos edited in | CC Express for Picsart / Canva
Separadores hechos en | Separators made in | CC Express for Samsung
Traducción con | Translation with| DeepL


