Greetings, fellow craft lovers! Welcome back to my workshop @bricolajedc. Today, I'd like to share with you a 100% DIY project, the kind I love, which is a corner table made from recycled materials. Join me and I'll show you the creative process.
¡Saludos amigos amantes de las artes manuales! Hoy les doy la bienvenida una vez más a mi taller @bricolajedc En esta oportunidad me gustaría compartir con ustedes un proyecto 100% DIY, de eso que me encantan, se trata de una mesa rinconera con material de reciclaje. Acompáñenme y les muestro el proceso creativo.

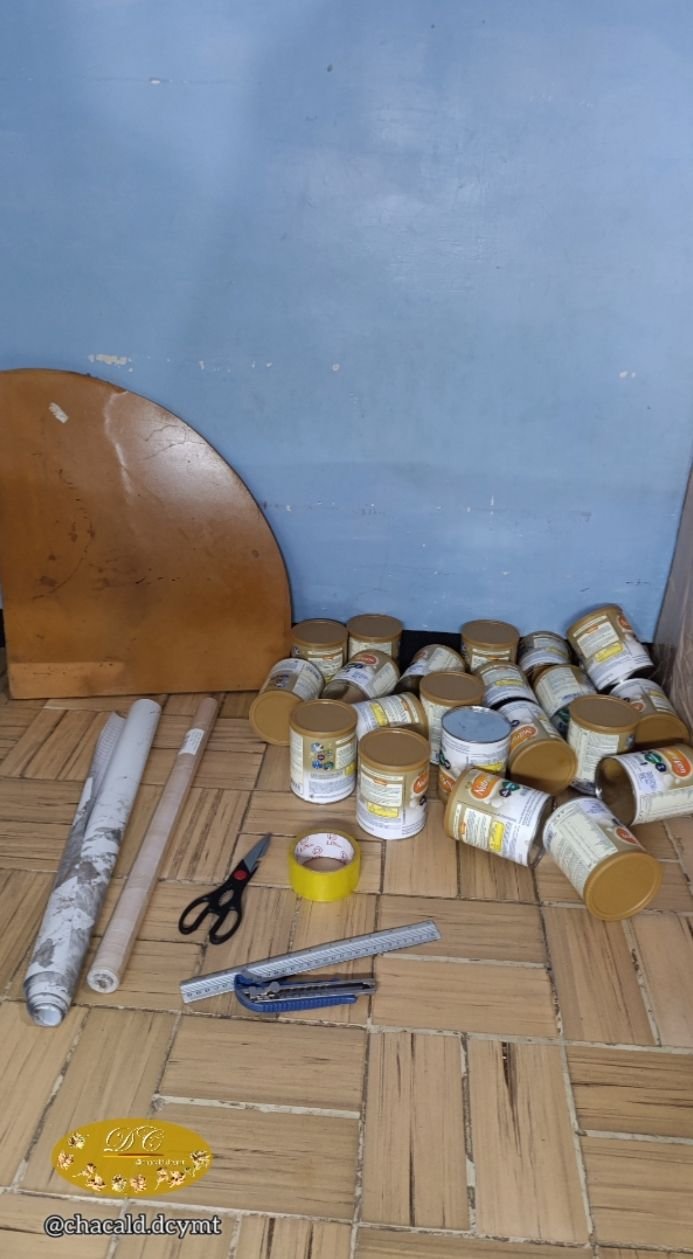
This idea came to me after my baby started complementary feeding and I had a total of 23 cans of formula milk piled up at home. What am I going to do with this tower of cans? That's what I asked myself every time I added one to the pile. The solution was to assemble the legs of a table to place a table tray on top.
Esta idea surgió después que mi bebé comenzó la alimentación complementaria tenía un total de 23 latas de leche de formula acumuladas en casa. Que voy a hacer con esta torre de latas? Era lo que me preguntaba cada vez que sumaba una al montón. La solución, armar las patas de una mesa para colocar una fuente de mesa.

Materials:
Recycled cans of the same size
Marble-effect self-adhesive paper
Wood-effect self-adhesive paper
3 bamboo placemats
3 3-centimeter lag screws
5-centimeter-wide transparent adhesive tape
2-centimeter MDF table base
In addition to this, we will need: a drill with a screwdriver bit, a plastic spatula, a dry cloth, a silicone gun, a heat gun or hair dryer, and a 50-centimeter metric ruler.
Materiales:
Latas de reciclaje del mismo tamaño
Papel autoadhesivo tipo marmol
Papel autoadhesivo tipo madera
3 manteles individuales de palitos de bambú
3 tornillos tirafondo de 3 centímetros
Cinta adhesiva transparente de 5 centímetros de grosor
Base para mesa en MDF de 2 centímetrosAdemás de esto, vamos a necesitar: el taladro con una punta de destornillador, una espátula de plástico, un paño seco, pistola de silicón, pistola de calor o secador de pelo, regla métrica de 50 centímetros.
Let's get to work:
We need three legs for this table (it's my design, but you could also use four). We'll make it whatever height we want. In my case, I need a table for the living room that would be perfect in the corner, so I've made it 50 centimeters high.
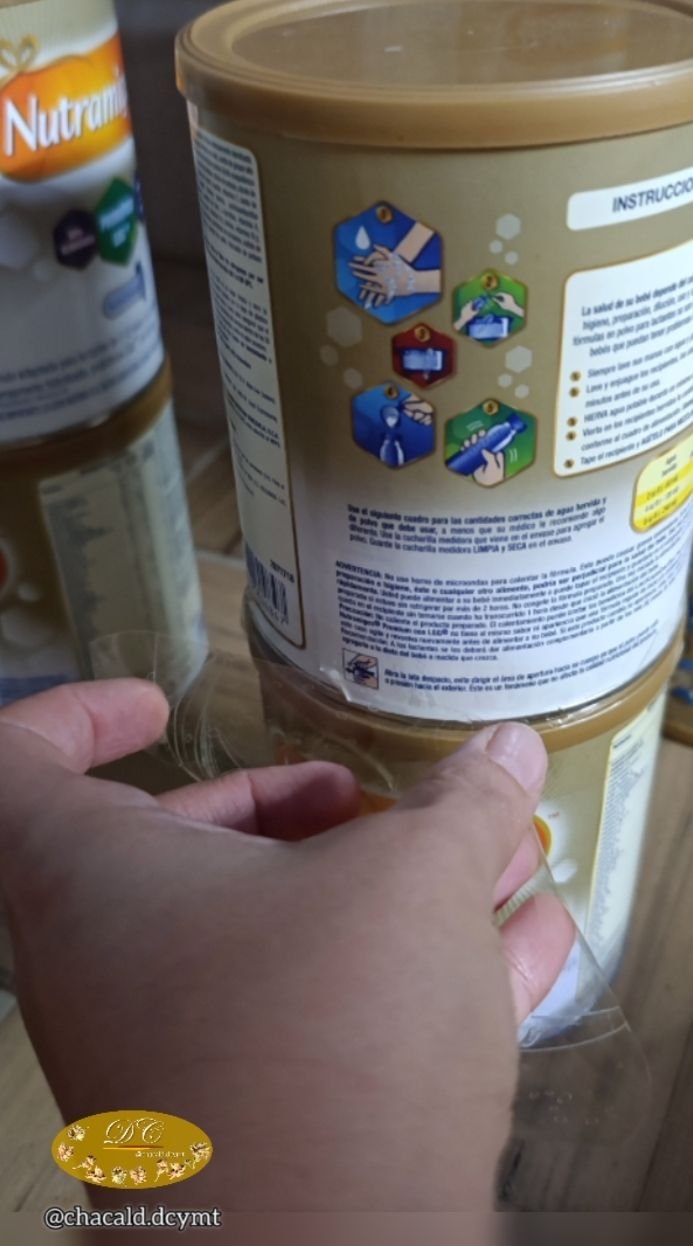
To achieve this height, we will need 4 cans. We are going to join the cans together to form the legs. We take the adhesive tape and press them together very tightly so that they are secure.
Manos a la obra:
Necesitamos 3 patas para esta mesa (Es mi diseño, pero pueden ser 4 también). Vamos a darle la altura que deseemos, en mi caso, necesito una mesa para la sala que podría ser un esquinero perfecto, por lo tanto la he adaptado a los 50 centímetros de alto.
Para alcanzar este alto, necesitaremos 4 latas. Vamos a unir las latas para formar las patas. Tomamos la cinta adhesiva y juntamos apretando muy fuerte para que queden fijas.
 |  |
|---|
Once we have the legs, we will cover them with wood-like paper to hide the label on the can. It doesn't have to be perfect, as we will cover it with bamboo sticks later.
Una vez que tenemos las patas, vamos a cubrir con el papel tipo madera,esto es para evitar que se vea la etiqueta del contenido de la lata. No tiene que quedar perfecto ya que luego lo cubriremos con los palitos de bambú.

We took the MDF base. I had previously cut one at an angle to make a corner piece and a rounded front.
We took the screws and positioned the legs to screw them in.
Tomamos la base de MDF. Yo tenía una cortada anteriormente con un angulo para hacer de esquinero y el frente en redondo.
Tomamos los tornillos y colocamos las patas para atornillar.

I think that with just one lag screw in each of the legs, the table is sturdy enough, but if necessary, you can use two screws.
We put the screws in before the marble-like paper so that they are hidden.
Me parece que con 1 solo tornillo tirafondo en cada una de las patas,.la mesa quedó lo suficientemente resistente, pero de ser necesario se pueden colocar 2 tornillos.
Colocamos los tornillos antes que el papel tipo marmol para que queden ocultos.

Let's put down the marble-effect paper. To do this, cut a piece that covers the entire MDF base.
Take the ruler and cover it with the cloth so that it slides easily and acts as a support for sticking the paper down without creasing it.
Stick one end of the paper down, slide the waxed paper a little, and use the ruler and cloth to stick the paper down.
Vamos a colocar el papel tipo marmol. Para eso cortamos un trozo que cubra toda la base de MDF.
Tomamos la regla y la cubrimos con el paño para que deslice y sea el apollo para pegar el papel sin que se arrugue.
Pegamos en un extremo de la superficie, deslizamos un poco el papel parafinado y con la regla y el paño vamos pegando el papel.
Let's put down the marble-effect paper. To do this, cut a piece that covers the entire MDF base.
Take the ruler and cover it with the cloth so that it slides easily and acts as a support for sticking the paper down without creasing it.
Stick one end of the paper down, slide the waxed paper a little, and use the ruler and cloth to stick the paper down.
Para que el papel se pegue muy bien y no se levante con el tiempo dejando burbujas de aire entre la superficie y el papel, vamos a aplicar calor para activar el pegamento.
Para esto utilizaremos la pistola de calor o el secador de pelo. Debe ser un calor fuerte para que funcione.
Vamos a tratar de pasar el aire caliente en cada uno de los tramos de la superficie para que quede pegado uniformemente.
Tomamos la espátula y vamos a colocar el paño en la punta para no romper el papel. Aplicamos presión sobre el papel después de darle calor.
 |  |
|---|
Then we glue the bamboo stick tablecloths to each of the legs with silicone. And that's it! We now have a beautiful 100% DIY table to decorate and set the mood in our spaces.
A table like this in a furniture store could cost between $40 and $60, but with these simple materials, it will only cost us $9.50.
Luego pegamos con silicon los manteles de palitos de bambú en cada una de las patas. Y listo! Tenemos una bonita mesa 100% DIY para decorar y ambientar nuestros espacios.
Una mesa así en una tienda de muebles podría costar entre 40$ y 60$ pero con estos materiales tan sencillos tendremos un costo de 9.5$

I hope you feel inspired to work on this beautiful project using recycled materials. I love my new table. See you next time. Bye!
Espero se animen a trabajar en este bonito proyecto, con materiales de reciclaje. A mi me encantó mi nueva mesa. Nos vemos en una próxima oportunidad. Chao!


Original content by the author.
Resources: App: Canva / Giphy / Inshot
📷 Redmi 13 note pro Smartphone
Translated with Deepl.com
✿ All Rights Reserved || © @chacald.dcymt 2025✿
💌 Discord: chacald.dcymt#3549
X: @chacald1
Reddit: chacald
Follow us on Instagram
_
Contenido original del autor.
Recursos: App: Canva / Giphy / Inshot
📷 Redmi 13 note pro Smartphone
Traducido con Deepl.com
✿ Todos los Derechos Reservados || © @chacald.dcymt 2025✿
💌 Discord: chacald.dcymt#3549
X: @chacald1
Reddit: chacald

Tienda virtual @bricolajedc
Síguenos en Instagram

