Greetings, fellow craft lovers! Welcome back to my workshop @bricolajedc. Today, I'd love to share with you a beautiful DIY perpetual calendar. Join me and I'll show you the creative process.
¡Saludos amigos amantes de las artes manuales! Sean bienvenidos una vez más a mi taller @bricolajedc. En esta oportunidad me encantaría compartir con ustedes un hermoso calendario perpetuo DIY. Acompáñenme y les muestro el proceso creativo.

Materials:
3 recycled white sheets of paper
1 recycled printed page with text
1 recycled cardboard box
0.5 mm black gel pen
Black fine-tip marker
1 sheet of colored paper
Glue stick
2 plastic sheets for laminating
Thick transparent adhesive tape
We will start by cutting the box into a small size. You can use a pencil organizer as a reference to determine the height. I cut two sides of the box diagonally to give it height, like a ladder.
Materiales:
3 hojas blancas recicladas
1 página impresa con texto reciclada
1 caja de cartón reciclada
Bolígrafo de gel punta 0.5 milímetros en color negro
Marcador punta fina de color negro
1 hoja de papel de colores
Pegamento en barra
2 hojas de plástico para plastificar
Cinta adhesiva transparentes gruesaComenzaremos cortando la caja en un tamaño pequeño, puedes tomar de referencia un organizador de lápices para darle la altura. Yo corté 2 lados de la caja en diagonal para darle altura, tipo escalera.

Using colored paper, in this case pastel pink, we are going to cover the box inside and out. We cover it with clear adhesive tape to make it strong and durable, as we can use this calendar every year.
Con el papel de colores, en este caso gustó un rosa pastel, vamos a forrar la caja por dentro y por fuera. Recubrimos con cinta adhesiva transparentes para que sea resistente y duradera ya que podemos usar este calendario todos los años.

Then, with the part that we are not going to use from the box, we cut three pieces in a staircase shape that will be the separators for
the days, date, and month. We will place them inside the box.
Luego con la parte que no vamos. A usar de la caja, cortamos 3 trozos en escalera que seran las separaciones para
Los días, fecha y mes. Los ubicaremos dentro de la caja.

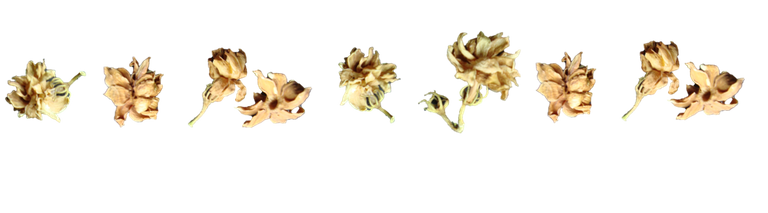
We take the white sheets of paper and cut out cards that fit the box. For the months, we will leave a tab that we will decorate. I chose a flower theme using the Zentangle technique.
Tomamos las hojas blancas y vamos a cortar tarjetas de la medida de la caja. Para los meses dejaremos una pestaña que es lo que vamos a decorar. Yo seleccioné la temática de las flores en la técnica de Zentangle.

A tip to save space and have fewer cards is to share the months between both sides of each card. In total, there would be three cards for the months and two for the days of the week.
Un tip para ahorrar espacio y tener menos cantidad de tarjetas es compartir los meses de 2 por cada lado de cada tarjeta. En total serían 3 tarjetas para los meses y 2 para los días de la semana.

We will organize the numbers from 1 to 9 and from 0 to 3 for the days of each month.
Organizaremos los números del 1 al 9 y del 0 al 3 para los días en número de cada mes.
 |  |
|---|
Once we have all the cards written, we are going to decorate them with the printed paper, with some torn pieces, and glue them between the drawings and the words.
Una vez que tenemos todas las tarjetas escritas, vamos a decorar con el papel impreso, con unos trozos rasgados y los pegamos entre los dibujos y las palabras.
 |  |
|---|
All that remains is to laminate the cards so that they last longer.
Solamente nos queda plastificar las tarjetas para que sean duraderas.
 |  |
|---|
Once the cards have been laminated, we will cut and punch out the edges in a round shape. Then we will organize the cards in the box.
Cuando estén plastificadas las tarjetas vamos a recortar y a troquelar los bordes de forma redonda. Y organizamos las tarjetas en la caja.

And that's how our little perpetual calendar turns out. It's a great way to start the year by making our own sturdy, durable calendar out of waste materials. I'm very proud of this project because it's so useful.
Y así es como queda nuestro pequeño calendario perpetuo. Una forma ideal de comenzar el año haciendo nuestro propio calendario resistente, duradero y con materiales de desecho. Me siento muy orgullosa de este proyecto por su utilidad.

I did this project live on one of my TikTok LIVE streams. If you're interested in having a good time with laughter, conversation, coffee, and an excellent craft project, follow me and join me in creating.
Este trabajo lo realice en vivo en uno de mis LIVE de la plataforma TikTok, si estás interesado en pasar un rato agradable entre risas, conversaciones, café.y un excelente proyecto de manualidades, sígueme y acompáñame a crear.

I hope you like it and feel inspired to make it at home. See you next time. Bye!
Espero les guste y se animen a realizarlo en casa.nosvemos en una próxima oportunidad. Chao!

Original content by the author.
Resources: App: Canva / Giphy / Inshot
📷 Redmi 13 note pro Smartphone
Translated with Deepl.com
✿ All Rights Reserved || © @chacald.dcymt 2026✿
💌 Discord: chacald.dcymt#3549
X: @chacald1
Reddit: chacald
Follow us on
TikTok
_
Contenido original del autor.
Recursos: App: Canva / Giphy / Inshot
📷 Redmi 13 note pro Smartphone
Traducido con Deepl.com
✿ Todos los Derechos Reservados || © @chacald.dcymt 2026✿
💌 Discord: chacald.dcymt#3549
X: @chacald1
Reddit: chacald

Tienda virtual @bricolajedc
Síguenos en
TikTok
Instagram


